Showing posts with label LUKE. Show all posts

Tuesday, August 26, 2014

First Day of Kindergarten!


Sam really wanted to be just like Luke and it's a good thing I foresaw that and got him a little shark backpack that I found for $4! 
 He wore it the whole way walking up to the school and held hands with Luke as we walked up to the school.  When it was time to leave, he was more mad at me that I wouldn't let him play on the Kindergarten playground than he was mad at the fact he couldn't go to school with Luke!
 Luke told me as much as he could remember about his first day--Learning the Letter A and practice writing it, his cubby where his pencil box goes, waiting in line to climb something on the playground and not having time because they got called inside.  Eating a personal bag of goldfish for snack...

I think he pretty much rocked it. 


Saturday, July 19, 2014

Luke’s Lego Birthday Party

This party was fairly easy to throw together—especially with the help of my mom and hubby who helped me do all the decorating the night before! My mom blew up a ton of balloons—would have taken this breathless pregnant girl 10 times as long to do that! And hubby did all the climbing on step stools to reach the higher decorating (definitely a no no for me!) 

There are so many great ideas on the web that it’s super easy to plan a great Lego party!  I even crossed off a bazillion things that weren’t needed (like a piƱata) and the party still turned out perfect!

First here is the invitation-- I made this in Photoshop and printed them as 5x7 photos at Costco (cheap).  Luke had fun delivering them to his friends. Lego Invitation smudged

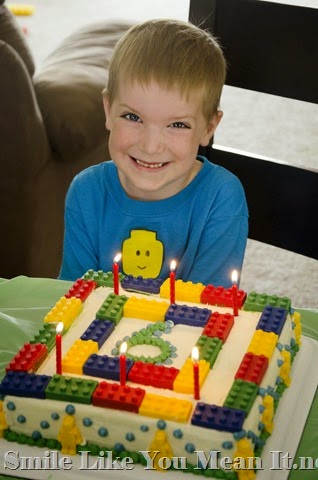
Here is the happy birthday boy and his little brother ;)  I made Luke’s shirt (you can find cheap t-shirts at Hobby Lobby or Walmart) using a freezer paper stencil and fabric paint (image at the end of post)DSC_8594-2

Our growing family! DSC_8596-2
The spread: DSC_8606-2

Party Favor Bags: cut out construction paper circles and attached them to these party bags (hobby lobby) for favor bags.  We filled them with Lego sugar cookies that I made and each kid got a Lego car kit, glow sticks and random candy. 

Mega Bloks were used to make holders for the eating utensils, napkins and plates!

We used these printables (deliacreates) to cover juice boxes

I made Lego faces on my computer and cut them out using my vinyl cutter then I just stuck them on these yellow cups for popcorn (Luke LOVES popcorn!) (download below)

I made these sugar cookies (Our Best Bites) and used M&M’s to make them look like Lego Bricks.  Luke was a great helper sorting out all the colored M&M’s for me!DSC_8612-2

The Cake!!  I make the Lego bricks using melting chocolates (Wilton brand/ Wal-Mart or craft stores all carry them in lots of colors) and Lego molds (Amazon).   It took me a long time to figure out how I wanted his cake to look, but we settled with simple ;) Then, as usual, it took 2 days to make it and decorate it!DSC_8608-2

Hubby hang all these balloons and streamers for me!DSC_8616-2

I enlisted hubby to build Luke’s name out of Duplos for the mantle and then my mom blew up and hung all these balloons!  DSC_8619-2 DSC_8621

For one of our games just there on the side for whenever kids wanted to do it, I made this Lego Man bean bag toss. I covered a box in wrapping paper, cut out the Lego Head (image at end of post) on 12x12 scrapbook paper and then cut out his mouth.   I didn’t grab a picture of the Lego bean bags but they were super easy to make!  Just cut squares out of felt, hot glue them together, fill with rice and then glue on circle felt of the same color to make them look like Lego bricks.  Then play Feed the Lego Man :) DSC_8622 DSC_8625-2

I made a crayon container with legos and printed off all kinds of Lego Coloring pages off the internet. Something to do waiting for all the kids to arrive. DSC_8615-2 
Also had this table set up for kids to play and build whenever they wanted to.  DSC_8654-2

We had a bunch of really easy games planned, but with the coloring pages and the table for building legos, the kids were pretty content.  We played just 2 games.  The first one we just see who could build the tallest tower without it falling over in 2 minutes! DSC_8635 DSC_8636

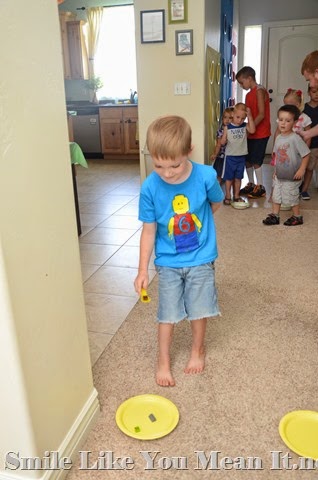
The second game we had a bowl of 10 small Lego bricks and the kids had to carry them over one by one on a spoon to the empty bowl.  The team that gets them all over to the other side first wins! DSC_8641 DSC_8644
 We had a pizza break in there since it was close to lunch time. DSC_8658

Then we opened presents DSC_8665
{i love how Sam is laying with his head resting on his hand in this picture} DSC_8667-2

Then it was the long anticipated time for CAKE! As always, Luke was really excited about his cake. DSC_8673-2
Lastly, I made kids take pictures in front of these giant Lego bricks I made out of dollar store table clothes and plates. 

Here is one zoomed out to give a better idea of what they looked like.  They were hung up on the big wall in our front entry so it was the first thing people saw when they came in!DSC_8593

This was the best shot I got of all the friends and cousins that could come!  Notice that stinker Sam only let his legs make an appearance (far left).  DSC_8683-2 I think this was the best and easiest party to put together that I’ve done so far!  I’m super happy with how it went and the kids had a lot of fun!  Thanks to everyone that could help out, attend and make it happen!
 ---------------------------------------
For those of you wanting some help with the cut outs here are the black silhouetted jpegs (see my printables tab for tips on downloading these to your computer)

Once saved to your computer, you should be able to use the “trace” option and cut them out with your vinyl cutter.  I use SCAL and a Cricut Expression and these worked great. 
 
The Bean Bag toss Lego Head: one with the face and one without.  I cut it out of 12x12 yellow paper and then blackened in the eyes and eyebrows with marker.
 

The faces for the cups 

This is the image I made for Luke’s shirt.  Cut it out of freezer paper, ironed it on and then painted it with fabric paint.  One with a 6 (the one I used) and one without. 
 

Friday, July 18, 2014

Luke Turns 6

These pictures were from Luke’s actual birthday day—his party we had a few days later. 

Scott was SO excited to finally give Luke his present (we bought it a whole month early!) —Lego Marvel Superheroes.  Legos + Superheroes = the perfect give for Luke!  DSC_8579-2 DSC_8580

After that we went to Macey’s and got giant ice cream cones which was a big hit.   DSC_8584-2 DSC_8589-2a Simple but perfect since his BIG Lego party would be a few days later!  Happy birthday, Mister!

PS how the heck do I already have a SIX year old!?!

Monday, September 02, 2013

Luke started Preschool


Luke was pretty excited to start another year of Preschool!


{Mommy was too worried that he wasn't ready for Kindergarten yet, so we did Preschool again at a really fancy preschool}


Wednesday, July 31, 2013

Avengers Birthday Cake using Frozen Buttercream Transfer

Luke wanted a superhero birthday cake for his birthday this year. I’ve made him some pretty cool cakes (One, Two-Elmo, Three-Dino, Four-Monster), but how does one make a superhero birthday cake? 

I thought the best way to get most of his favorites on to his cake would be a picture.  I thought of sugar sheets but didn’t know how to get one made.  Then my mom sent me this link and I'd found the answer!  Frozen Butter cream transfer!

However, finding the right Avengers picture was a little more difficult.  You would think it would be easy to find a basic picture (like a coloring book page) but many still have too many details that wouldn’t transfer well with this technique.  I finally settled on a picture, but I had to clean it WAY up in Photoshop.  I just edited out many of the detail lines that would be too hard to transfer into a frosting picture.  There were two more characters and a cityscape behind them that I had to erase also. 

Here’s the picture I ended up using after all my editing:
I wanted a picture in color to make it even easier.  Knowing what was supposed to be which color made the frosting of the transfer go much quicker.  After printing out this image in the size I wanted, I use a black sharpie to trace all the lines thicker.  This helped me edit out even more detail lines that were un-needed. 

When you’re ready to start, you place this image under a sheet of wax paper and tape both securely to something hard.  I used a thick cutting board.  It has to be something that will fit in your freezer, too.  Lucky for me I have a chest freezer in the garage, so I didn’t have to worry too much about size.  Realize that the image will be a reverse when you flip it onto the cake, so if you do wording print a reverse image. 

Then you start tracing the image. I bought a tube of Wilton black icing as recommended in the video clip.  My tips didn’t work on the tube, but I just put the frosting in a bag and used it like the rest of my frosting.  If you do something with this much detail, you most definitely will have to use a size 1 round cake decorating tip (smallest they have!) I used a 1 and a 3 for the entire transfer, but mostly it was easiest to use the 1.  If you can borrow a spare or buy 2 because with this many colors it’s a pain to wash and move the tip multiple times.   DSC_4091-2

After the tracing of the main lines, I let it freeze overnight. 

The next day I whipped up a batch of butter cream frosting.  I like this recipe, but I did 1/2 butter and 1/2 butter flavored shortening.  One batch was enough just for this transfer part.  I had to make another 2 batches to frost the rest of the cake!  This was a lot of different colors, so make sure to have enough frosting bags (you can buy a box of 12 disposable ones) and several couplers, too (i had 5 total). DSC_4094-2

Then start coloring!  DSC_4093-2

After you’ve colored everything, let it freeze again.  I let it freeze overnight again. 
Then take the same color as the rest of the cake (in my case white) and created a really thick border around the entire edge. DSC_4096-2

After that, cover the entire thing with a thick layer of that same color (no pic).  This will make the transfer nice and thick and it won’t break when you flip it onto your cake.  Let it freeze for a couple hours before flipping it. 

Here is Luke’s finished Avenger Cake!  I love that Iron Man is kind of saying “5” because that’s how old Luke is on this birthday.  Those little dots on the picture is just condensation—it came out of the freezer and it’s the middle of July…

I filled in another border of white around the picture to fill in a bit of a crack that was there between the transfer and the cake itself.  DSC_4177-2

Ta-Da!  A super awesome cake! Finished!

And I only freaked out a little when Hubby came in for a hug and nicked it with his elbow!  I just scraped it off and fixed it up and no one even knew but me!
(in this pic you can also see how i filled in the crack between the picture and the cake)DSC_4185-2

Happy Birthday to my FIVE year old!DSC_4169-2

Tuesday, July 30, 2013

Luke Turns 5

Somebody pinch me because I can’t believe he’s already five years old!!DSC_4173-2

We spent the day at Seven Peaks water park and I’ll put up more pictures of that up later.  He was a bit worn out and both kids zonked out in the car on the way home!IMG_20130717_111721

  Luke was lucky to have lots of family around for his fifth birthday! Here are all of his cousins that were able to come help him celebrate!DSC_4215-2DSC_4218-2b

He was over the moon with his cake! He got to watch me making it because it took a couple days!DSC_4208-2DSC_4203-2

He wanted to eat Hulk’s head, and he ended up with a massive piece of cake that took him a couple of days to finish!  It was super cute because he was asking all of his cousins which superhero was on their cake.  I love making my kid’s birthday cakes for this very reason.  They absolutely love it which makes it all worth it in the end!    DSC_4227-2

Sam also thoroughly enjoyed cake and ice cream.  Much more than six months ago at his first birthday.  DSC_4225-2 

On to the presents!  I love how excited all the kids get even just to watch the presents get opened!DSC_4233-2

His cousin, Isaac, was so excited about the present he picked out for Luke that he was whispering things to him as Luke opened it. DSC_4239-2

Luke loved all the superhero masks I made for him. DSC_4243-2DSC_4258-2

And he was especially excited about his new bike!  He wouldn’t ride it because it was bigger. But we got him to ride it a few days later and now I can’t keep him off it!DSC_4249-2 

He got superhero t-shirts and a stomp rocket from his Grandma & Grandpa Harris.  We took it out right away and the kids had a blast making it shoot up in the air!DSC_4267-2DSC_4263-2DSC_4271-2 It was a very fun and exhausting day!  I think Luke loved every minute of it!

A few days later he got his present from Grandma & Grandpa Brown.  They got him his very own tent that has a camping chair and sleeping bag!  A few other fun things like a glowstick flashlight and camping accessories.  He can’t wait to go camping with Daddy again.  We’re going to set it up in the backyard this week and have a little campout.   DSC_4394-2 DSC_4407-2 Happy 5th birthday Luke!

other posts you may like

Related Posts Plugin for WordPress, Blogger...